

LAWN AND GARDEN
1. Trim or Remove Trees & Shrubs
If you want to help your plants grow better, then you should trim your trees and shrubs from time to time. If parts of the trees or shrubs have diseased, then it is best to remove or trim away the dead areas which will stop the disease to spread to other plants.
Specialized equipment will be needed for trees that are exceptionally tall or if they have grown in odd ways as their branches can be hard to reach. Another concern
When it comes to the removal of trees or shrubs, it is best to leave it to a professional because some roots can be hard to pull up and it may involve a lot of pruning of foliage or have hard to access branches. When a tree is dead, you have the option to either have the tree trimmer grind the stump down to the ground or have it completely removed.
2. Mow and Maintain a Lawn
If you care for the exterior beauty of your home, then keeping up with the maintenance of the lawn is crucial. The simplest way to have your yard looking decent is by making sure to mow the lawn from time to time. For your grass to recover quickly, make sure that the blades of your mower are always sharp.
Lawn fertilizers that have nitrogen are excellent to keep the soil healthy all year round. Organic or synthetic fertilizers can be found for the cold season as well as the warm season. Water your lawn periodically which is best done in the morning but be cautious not to drown it; one inch of water is enough on a daily basis.
To accompany your beautiful looking lawn, you can take care of other maintenance projects which include lawn edging. This is done by creating a visible line between the grass and bed through various materials like bricks, wood, stones, plastic or concrete. Furthermore, if you have shrubs, trees, and flower beds, make sure to keep them trimmed and pull out dead flowers as well as unwanted weeds.
3. Remove Leaves
Having plenty of trees on your property is truly a bliss as they are beautiful to look at and they hold plenty of benefits. However, when fall comes around, and those leaves start falling to the ground, it can become a big mess if you do not take care of them.
Leaving the leaves to decompose where they are is one way to go but keep in mind that it might kill the lawn underneath and bundles of leaves can be a great hiding place for wildlife.
You can contact a professional to remove the leaves for you or just do it yourself. Professional leave removers will either blow the leaves off your lawn or bag the leaves to dispose of them properly. Another removal technique that is used is vacuuming where the leaves are vacuumed, bagged and removed.
Use a rake to bag and remove the leaves yourself or put your lawnmower into action. The lawnmower will act just as the vacuum does and chop the leaves into pieces. The dust from the leaves can then be used as a mulch in your garden which only needs some watering for the decomposing to begin.
4. Sprinkler System Maintenance
Having a well-functioning sprinkler in your garden will save you a lot of time, but it is important to include regular sprinkler maintenance to ensure that they function correctly.
If you live in an area where the winter gets very cold then winterizing your sprinkler is a must. For this, you will need to buy or rent an air compressor which is used to blow out all the water before the cold weather hits. Sprinkler winterizing will prevent water to freeze inside the system that can cause the system to crack and break.
Before spring arrives, the sprinkler system needs to be activated correctly by making sure the pressure is right and that there are no leaks in the system. Check the filters and the sprinkler heads as well and then turn on the water.
A good sign that your sprinkler head is not working well is when you see an area of your lawn is looking drier than the rest. Sprinkler heads can get clogged over time by dirt or debris which needs to be cleaned out for them to function correctly. Sometimes problems are caused by plants or grass obstructing the system. Therefore, always make sure that the lawn is maintained and that no plants are in front of the sprinkler heads which can cause overflowing in specific areas as well.
5. Install a Sod
If you wish to have an instant lush lawn, then you can install sod. You can either install turf by yourself or make use of a professional sod installer.
First, a soil test will be needed to ensure you have the perfect growing environment for turf. An excellent thriving condition for truth is well-aerated soil with a 6 – 7.5 pH level. Fertilizers can be used to obtain the desired pH levels.
Measurements of the area that needs to be covered should be done carefully to ensure you purchase the desired amount. It is always safer to order 5 percent more sod than is necessary as you will be doing plenty of cutting and fitting around curves.
Before the sod installation can begin, debris needs to be removed after you unearth the soil. A rototiller is a useful tool that will help you loosen the ground, and a rake helps to even out the surface. For improving aeration, water retention and to increase the microbial population, you can put some organic matter into the soil. Once your sod is laid out and pressed, frequent watering will be needed, and lawn fertilizers are always welcome.
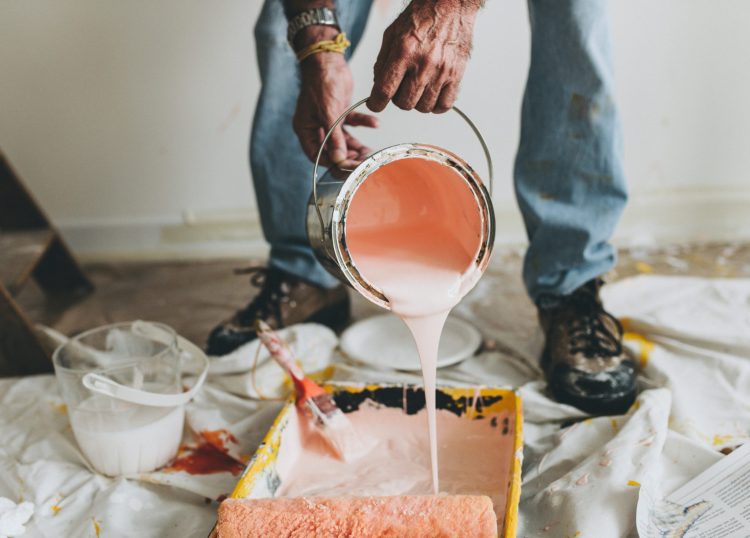
PAINTING
1. Home Exterior
Painting the exterior of your home is a big job, best left to the professionals. However, it is always good to know beforehand what goes into the project so that you can be well prepared and be aware of the initial cost.
A professional painter usually charges based on the square footage of your home. Other factors that can affect the price is the number of stories of the house and the ease of access.
Proper preparation ensures for a smooth and lasting finish. This includes washing the exterior of your home with a power washer to get rid of
You can expect your home exterior paint job to last anything from 4 to 8 years, depending on the quality of the paint and materials. Therefore, it is best to choose the highest quality exterior paint that fit your budget. High-quality paint will give you the best look and better coverage as well as durability.
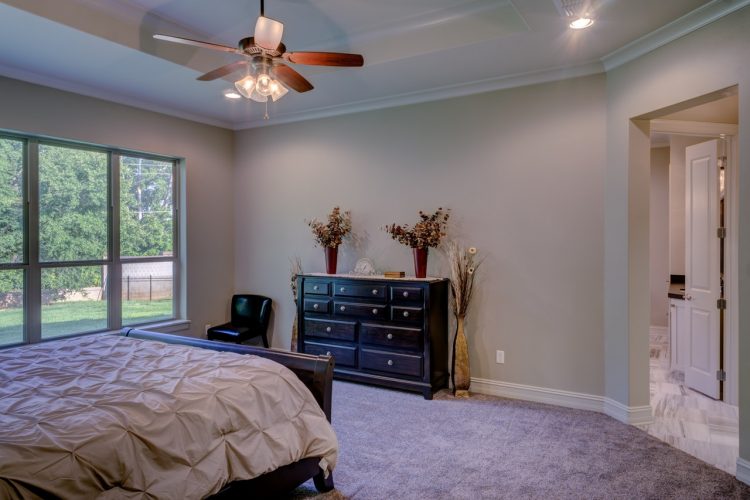
2. Interior
For a quick facelift to the interior of your home, a new coat of paint can do wonders. To help you decide which color scheme fits you interior best, you can sample some paint from your local paint stores and test it on your walls first.
When painting your rooms in different colors, it is always best to choose colors that relate to one another. Paint for interior purposes can come in three different finishes. A flat finish goes well in areas that do not need frequent cleaning, like the living room for example. A semi-gloss is good to use on the trim, while a high-gloss finish works best in hallways or on the kitchen walls as it can be cleaned easily.
A gallon of paint can usually cover about 400 square feet, but keep in mind that a textured wall will need more than that. Additionally, you will also need to invest in a primer paint which will help the color to stand out against the under-layer of paint that you are covering.

DOORS AND WINDOWS
1. Install Windows
Windows add significant value to a home because it provides light, warmth, view, and beauty. However, you should make sure the window installation and materials are of good quality to eliminate the risk of intruders and to increase the
Windows with wood frames are beautiful and sturdy, but they cost more, and they need to be regularly maintained. If you are looking for a less expensive choice, then vinyl windows are an excellent choice, and they do not require much maintenance. Another material option is the new composite window which is a combination of PVC polymers and wood fiber that allows for a stronger, good-looking frame.
Most professionals will charge per window installation, but it will cost less per window if you have several to install at the same time. Therefore, if your windows are outdated, it makes sense to replace them all at the same time. Having new windows installed with a lower U-factor is more expensive, but it will improve the
2. Replace Window Glass
If you are a handy-DIY kind of person and have the right tools, you might not need a professional to do a window glass replacement for you. To replace the glass of a window, you would need some protective gloves and a small hammer to remove the old window glass. Afterward, the frame needs to be cleaned, and the old putty needs to be taken off. You would need a glass that fits in perfectly into the framework which would then need to be secured with a thin layer of putty where the glass meets the frame. Afterward, the putty should be scraped to even it out and once its dry it can be painted or covered with the layer of trim.
If you are upgrading your windows and have multiple windows glass that you want to replace, then it is probably best to hire a professional. There are different glass upgrading options available. A low-E glass will minimize solar warming in your home and argon glass will increase energy-efficiency. If you want to prevent future damage to the pane then tempered glass is a great option, while designer glass will provide your home with an attractive look.
3. Install Weather Stripping
Installing weather stripping throughout your home is not that expensive, and it can even become a DIY project if you want to save on the installation costs. Weather stripping your home is an effective way to improve the
Mainly weatherstripping materials are used to seal openings in the construction such as doors and windows. Weather stripping can be found in various materials and designs, including tapes, V-strips, magnetic, gaskets, door sweeps, fin seal, felt, etc.
The type o weatherstripping you use will depend on what area you are trying to seal. Tapes, for example, are good to use on oddly shaped gaps while door sweeps and gaskets will fit at the bottom of the door to eliminate drafts. Some weatherstripping materials can be installed in such a way that they are not visible, while some less expensive option might not be that appealing. A good handyman can help you make the right decision on what materials to use that will fit your budget and your style.
4. Install a Garage Doors
A new garage door can range anywhere from $200 for single doors to $4,000 for two or more doors. The better the materials, the higher the costs will be. Whether you are making a new installation or replacing an old garage door, the installation cost will usually average around the same price. Keep in mind that there might be an additional cost for the removal and disposal of the old garage door or the resizing of the opening or the reframing of the exterior.
Garage door installation usually involves electrical wiring and a heavy and awkward installation process which is best left to a professional. If you want to increase
Garage door materials can come in a different grade, including custom wood, wood composite, vinyl, and steel. The materials range from affordable single layer doors which are most prone to dents to the more heavy door with thick insulation.
There are four styles when it comes to garage doors, which includes the swing out, swing up, roll up and sliding door. It all comes down to your budget and what style you prefer. Garage doors can also be completely customized to fit all your preferences.
5. Install a Door
Some of the materials for a door that is available are wood, steel, aluminum, fiberglass and many more. The installation for exterior doors
While the door material plays the most significant role in the initial cost, the style and application will also impact your budget. The style of the door will include options like flushed, paneled, arched, glass, pocket, bifold and bypass or sliding. Additional materials that would are needed for a door installation is mounting hardware, hinges, screws, and threshold.
A good quality exterior door will be able to take the beating from use and the weather and at the same time look good doing so, while holding in the heat. Another factor that is important when installing an exterior door is the framing. Framing with load-bearing header additions are an excellent choice and framing with flashing will keep out water.
Custom doors will include security systems, transoms, and sidelights. When you install a door in a new location, the need for drywall work, electrical and plumbing might be needed.
Installing an exterior door can be a complicated process. Therefore, it is better to hire a professional for the job so that the door will be weather tight and secure. If you have enough patience, then an interior door can become a DIY project, wherein you should make sure to line every angle and check every corner.
6. Install a Screen
If you want to keep the bugs out, but still let the fresh air in, then you can install a screen. A screen can be installed for windows or doors, and they are usually not that expensive and easy to install yourself.
Screens can be easily damaged when an object hits them which will require a screen replacement or repair. To repair a screen, you can make use of screen patches which will stop a puncture to turn into a tear.
Movable screens are also available on the market. These type of screens are usually higher in cost when it comes to installation, but they will offer you more functionality. There is a variety of movable screen types, including retractable screen, adjustable screens or hinged screen.
While there are many types of screens on the market, the ones for a non-standard window might be difficult to find. In such a case you would have to cut the screen or have it done for you by a professional.
ELECTRICAL
1. Install a Ceiling Fan
Besides installation costs, the style and the size of the ceiling fan are two additional factors that will play a role in the final price of a ceiling fan installation.
When it comes to choosing the size of the fan, you should keep the size of the room in mind. To cool a large room efficiently, you would most likely be better off with a fan that has a large motor, or you can make use of two smaller fans. Therefore, make sure you know the functionality you are looking for beforehand.
Most fans use about the same amount of power as light fixtures, so if you have a fan installed together with a light fixture, the circuit should be able to handle the capacity of both. A new circuit can be connected from the homes main panel to the fan if the original circuit is not strong enough to handle the fan.
Ceilings fans can have either exposed cords that can get plugged into the wall socket or an electrical installation that runs into the ceiling. If you do not have a pre-existing fixture in the room, then new wiring needs to be installed, which should be done by an electrician. Either way, installing a new ceiling fan or replacing an old one is a relatively simple process that will have you reap the benefits in no time.
2. Install Electrical Wiring
Electrical wire installations are a dangerous project and can be hazardous if not installed correctly. Therefore, it is always best to hire a licensed professional for rewiring jobs and panel installations.
Most wiring projects will require a permit and inspection to meet specific codes. The electrical wires, material cost and the hourly rate of the electrician will all play a role in the final price of your electrical wiring needs. An average wiring or rewiring project can range from $530 to $2040.
The materials that are needed for your wiring project would most likely be factored into the installation price. One of the most significant expense is usually the breaker box (panel). Most modern homes today need 100 or 200 amps to handle the amount of electrical load.
Furthermore, additional materials like outlets, switch plates, light fixture
3. Install Light Fixture
Light fixture installations involve electrical installation. This job requires a professional for the job to avoid electrical hazards and to make sure it upholds the local codes of the electrical work. So, basically, the homeowner needs to decide on the type of light fixture and find a licensed electrician for the installation process. It is crucial to first consult with a professional whether the installation area will be able to handle the power of the light fixture you have in mind.
Light fixtures can range from traditional ceiling mounted lights to wall mounted lights, which needs access to a mounted electrical box that is connected to the in-house wiring.
Another option is recessed lighting, which can be more complicated because it needs to be set up into the ceiling. Cutting and finishing drywall will also be part of such an installation project. Examples of this kind of lighting setup are track light, pendant lights, and fluorescent lights.
When a new home is being constructed, the electrician will complete the wiring to the light fixture areas, the junction box installation, and the switches before the drywall goes up. Older homes that have outdated electrical wiring might need rewiring before a new light fixture can be installed.
4. Install a Generator
A generator is a device that is used when a power failure occurs. It converts mechanical energy to electrical energy that is used in an external circuit. It is excellent for homes or businesses that are prone to a power failure in areas where severe weather or natural disasters happen often. Even though generators can be expensive, they can be crucial for a business that needs electricity around the clock.
You can either install a small portable generator which can cost as little as $300. Smaller devices can be used only for the essential appliances in your home. A larger generator costs up to $15 000, which will provide enough electricity for the entire home or business.
There are different generators on the market, including gasoline, natural gas, diesel, liquid propane and solar. Solar is, of course, the most sustainable of them all.
With smaller portable generators you do not necessarily need a professional to do the installation. However, you would need a prepared concrete area on which the generator should be installed. Professionals do more significant generators installations, and the installation price will additionally be between $500 to $3000.

LANDSCAPING
1. Repair a Deck
Depending on the significance of the repair work, a deck repair can be a DIY project if you have some carpentry experience.
Some simple deck repairs might include, fixing the railing, replacing missing screws, fixing popped nails, or anchoring loose steps. If the wood is healthy and the deck structure is intact, then small maintenance might do the job, but sometimes it is best to tear everything out and start over.
Areas, where mold or rot is found, will have to be trimmed away and filled up with putty, but it is most important to figure out what causes the problem. Drainage or plumbing issues are sometimes the culprits of mold or rot. If you are dealing with mildew on the surface, then a thorough power washing will do the trick. In the case of pest, a pest control specialist can take care of the problem.
If your deck boards are unstable or rotted, then they might need to be replaced. When replacing some deck boards, it is always best to stain and seal them afterward as it will increase the overall health of your deck.
2. Seal and Waterproof a Deck
If you want to keep your deck beautiful, then it is crucial to seal it every few years, but in some climates, it will need sealing every season.
Sealers help to prevent moisture from staying in the pores which reduce the risk of mold and mildew forming. However, sealers will not be able to withstand significant amounts of water. A deck that can not shed water will give moisture and dampness a chance to gather and sit up against your home which will eventually lead to mold and mildew on your foundation and walls as well. Therefore, waterproofing your deck before you add a sealer is a must.
When it comes to sealers and waterproofing, there are different types to choose from, from an oil-base, water-based, varnishes to epoxy resin. There are many products on the market each with pros and cons. Therefore, it is best to consult with a professional to figure out which is the best fit for your deck material.
It is critical to clean the deck before the refinishing can start. If you neglect to do so, you increase the risk of trapping the moisture of the dirt and debris into our deck. And while you are at it, it provides the perfect opportunity to inspect your deck up close.
3. Install Sprinkler System
If you want to add some curb appeal and help to reduce the carbon footprint, then you need to keep your lawn green which. This can mean a lot of maintenance for which the best solution is a sprinkler system which will do the watering for you.
The size of your yard, the quality of materials, the type of materials you choose and the labor is just a couple of factors that will influence the price of the sprinkler system. Sprinkler systems consist of valves, pipes, sprinkler heads
It is essential to determine the location of the pipes beforehand. The sprinkler heads should also be chosen carefully as different heads might be needed for different zones in your garden. If you already have flowers and grass on your yard, trenches will have to get dug to lay the piping for the sprinkler system.
By using sprinklers, you will conserve more water as you will have control over your water distribution.
4. Build a Deck
Deck material fall into three main categories which are natural wood, pressure treated wood and plastics, and composites. Furthermore, decks within these categories come in various styles and materials whereas each has their pros and cons. You should also calculate the money and time that will be spending on maintenance over time, some decks like composite decks, for example, do not require regular maintenance like certain wood decks.
When installing a deck, it is best that the surface of the deck is no more than two inches below the access door. This will ensure a clean appearance and a comfortable step up or step down. Your deck should be in proportion with the rest of the house. Therefore, the deck should not be larger than the largest room in the home. Added deck additions might include lighting, heater, seating, patio enclosure or misting systems.
The type of material and the shape of the deck will also influence the installation price. Therefore, keep in mind that the cheapest material will not necessarily turn out to be the most affordable option as it might be more complicated to install.
5. Install Landscaping
When it comes to landscaping, there are many things to take into consideration. Whichever look you are going for, it will need some professional planning to ensure that your landscape is functioning as efficiently as possible.
Landscaping is a significant investment, especially if you have a large property. However, landscaping can also be done in sections if you do not want to invest a large sum of money in one go. The best is to consult with a professional who specializes in the style you want and figure out a plan that will gradually fit your pocket and add to your properties appearance.
Lawns are in most cases the least expensive to plant. However, you should keep in mind that it will need regular watering and maintenance which will be a constant expense. A water irrigation system is a good investment if you have a landscape that requires frequent watering. Make sure to set aside areas for a flower or vegetable garden if that is what you want.
Xeriscaping is another way to go, which involves the creation of a landscape that does not need much water to thrive. Even though this option is more expensive to install, you will benefit from the low water and maintenance costs.
Additionally, you can install a patio, lights, a pathway and more, the options are plenty to ensure you get the style that you want. Landscaping is a great way to change the appearance of your home and property.
6. Install Patio or Pathway
Both patios and pathways are an aesthetic addition to your property while bringing significant value to your home. Each one has their benefits. For instance, patios provide a livable outdoor space and pathways are a practical way to keep foot traffic off the lawn.
Before installation can begin, certain things should be worked out ahead of time. In some cases, the process of grading or excavating needs to be performed to level the surface of the ground. Drainage should be kept in mind as well and also the lines for plumbing, gas and electrical. A professional will be informed about the local codes in case there are regulations for building patios in your area.
There are four types of material to choose from if you are installing a patio or pathway, they are concrete, flagstone, gravel, and pavers. All of them have different benefits and characteristics as well as a diverse price range, whereby gravel will be the cheapest option and pavers the most expensive.
When designing your patio, it is wise to know what furniture you want to use ahead of time to reserve enough space for furniture or any other additions you like.
A pathway is a great way to highlight a specific area in the yard while a patio will provide you with a perfect space to entertain your friends and family.
PLUMBING
1. Install or Repair Water Heater
Small repairs to your water heater might be needed overtime which should be inspected by a professional. But sometimes more significant issues may occur with your water heater when it is at the end of its lifespan, which in most cases is around ten years.
Water heaters can run on either gas or electricity. You can install a tank style heater which will heat and store the hot water or a tankless water heater, which does not store the hot water but instead heats the water as you use it. Tankless water heaters are known to be more energy efficient and will save you money in the long run. Tank water heaters are less expensive to purchase and easier to install.
The best way to determine what size tank heater you need is to multiply the number of people in your household by 12. This will give you an indication of how big the gallon size should be so that you don’t heat water that will not get used.
Solar water heaters are of course the most efficient systems to install. However, they are a costly choice. Hopefully, with the development of modern technology, these kinds of water heaters will become more affordable for everyone with time.
2. Install Plumbing Pipes
The pipes in your home might have to be replaced when you are experiencing low water pressure as it is a good sign of corrosion in the pipes. Holes and leaks will cause you much more significant problems if the corrosion advances, therefore it is best to take care of the situation in time.
Pipes installation will have to be done by a professional. However, it is good to know beforehand what the material options are. The most common materials for home piping is copper and PEX. Copper is an excellent recyclable material for indoor use as it is bacteria resistant, but as a downside, it can corrode and burst over time. PEX can be installed easily because are made of flexible plastic, but there is a risk of water contamination.
The type of material and the size of your home will mostly affect the installation costs. Installing pipes from scratch is less expensive whereas replacing pipes will be more costly due to the demolition progress of the existing pipes. It is best to find a trustworthy plumber who can work out a piping plan that will fit your area and home the best.
3. Install a Faucet
Faucets are a great way to upgrade the look of your bathroom or kitchen area. The installation cost will vary depending on the complexity of the faucet system and on the location. Old faucets that are heavily rusted or which contain broken parts will be trickier to remove and will add to the cost of installation.
In most cases, kitchen faucets cost more to install, because of the bigger models involved. It is always best to find a faucet that will fit within the design of your sink and countertop to avoid cutting out parts of the counter or having to replace the sink altogether.
Besides from different materials and finishes, faucets will vary in designs that can give you
Faucets can also be upgraded by adding a filtration system, lights, etc. One thing that will need an upgrade though
It is crucial to keep the faucet in line with the plumbing so that it can handle the water pressure. Therefore, make sure to choose a faucet that can handle the type of water control setup you have. In most cases, a professional needs to be contacted for the installation process.
4. Install a Septic Tank
Homes that are not connected to a municipal sewer plant will usually have a septic system to take care of the waste-water collection as well as a system to distribute the clean wastewater back into the land.
You can either choose an Anaerobic system which relies on the anaerobic bacteria to break down the waste or an Aerobic system which makes use of aerobic bacteria to break down the waste.
If you install a septic tank lower than the drain field, then you will need additional pumps to bring the effluent up to the drain field. Most systems regardless of whether they function correctly or not will need pumping every two to three years.
Installation of a septic tank will involve some digging in the ground, and you may need a building permit to ensure everything is according to code. Most tanks will last up to 20 years if they are cleaned and maintained correctly.
HVAC
1. Install or Repair an AC
Regular servicing will keep your AC in good running order for most of the time. Signs of malfunctions include cool air from the vents, short cycling, strange noises or smells, water leaks or a frosty AC unit.
Repairs may involve a refrigerant recharge, leak repairs, replacement of various elements like the circuit board, thermostat and more. Neglecting to address the problem can lead to an increase in power usage and more significant problems later on. The best option is to contact a certified professional for repairs.
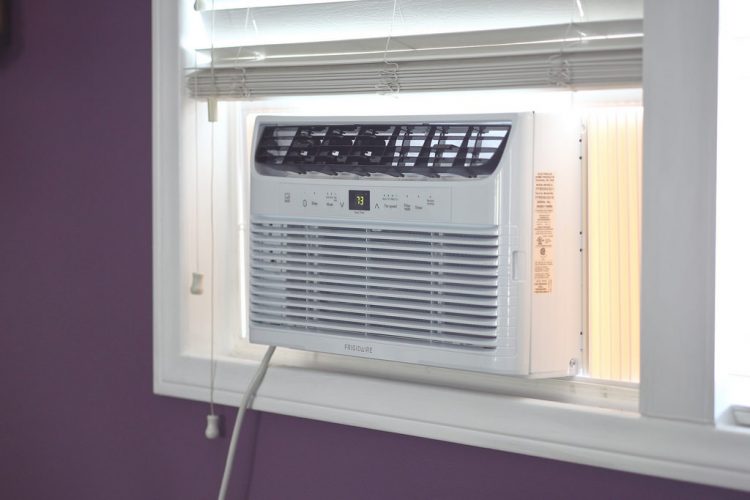
When installing a new AC, there are several systems to choose from which is a window unit, split system, central system, or a portable unit. However, the size of your home will determine the type of system you will need. The installation contractor will perform a load calculation to figure out which is the right central air conditioning unit for your home. Wiring, ductwork and metal bracket mounting is all part of the installation process.
When choosing your AC, keep in mind that it is possible to qualify for the tax credit from the federal government when you purchase
energy efficient AC products.
2. Install or Repair a Furnace
Repairing a furnace can range anything from $130 to $900. The lifespan of a furnace can be up to 20 years, depending on the type and brand of your product. If your furnace is near the end of its lifespan or if it is giving you problems frequently it might be at your best interest to replace the entire system.
An energy efficient furnace is an excellent replacement for an old furnace as you can make back the investment through lowering your energy bills. Furnaces vary from electric, propane gas, natural gas, etc. The best way to reduce maintenance costs is to install the same type of furnace that the home already had. This will exclude other installation processes like ductwork or the running of electric lines.
Regardless of the age of your furnace, you should inspect it annually along with the cleaning and replacement of the filters which will
keep the efficiency up to standard. Therefore, the best way to expand the lifespan of your furnace is to keep up with regular maintenance.
3. Repair a Boiler
A boiler unit can perform reliably for years because they consist only of a few mechanical parts. When problems appear like poor heat, no heat or leaks, the cause can be due to improper water levels, a deposit of minerals, or a malfunction in the ignition or pilot. Other problems can also develop in the expansion tanks or circulator.
Repairs might involve the replacement of individual parts, like valves, the expansion tank, pipes, the ignitor switch or the circulator pump. Also, do not underestimate the power of regular maintenance as it will minimize the risk of malfunctions and increase the efficiency of the boiler.
Boiler maintenance includes cleaning and repairing blocked air vents and flues, making sure the water level is adequate, fixing small leaks around the unit, descaling hard water, and flushing water.
Even though many stores sell DIY kits, for instance, a cleaning kit for cleaning out debris and descaling the water, it is best to hire a professional when it comes to fixing more significant boiler repairs. By contacting a professional, you will avoid electrical, gas or water leak hazards.
4. Clean Ducts and Vents
By cleaning your ducts and vents every 1 to 5 years, you will be helping the airflow and energy efficiency of your HVAC system. When your ducts are being cleaned, take the opportunity to get your dryer vent inspected as well. Dryers vents that are clogged can decrease the energy efficiency of your HVAC system, and it could even become a fire hazard.
If ducts and vents are not maintained frequently, the build-up of dust, pollen and mold can cause spores to release in the air. Therefore, if you see a decrease in dust, dirt, dander, and mold or even the smell of mold, it is a good sign that your ducts and vents need cleaning.
It is possible to clean the ducts and vents yourself. However, it is more an on-the-surface approach which involves the use of a duster or vacuum. A professional will use a powerful vacuum system that can loosen and blow the particle outside of the house.
If your air conditioning system is up to date, you can avoid professional cleaning by replacing your filters throughout the year. But if you notice more dust or debris around the house or that the filter is in need of a change more often, then a high-pressure cleaning will be in order.
ROOFING
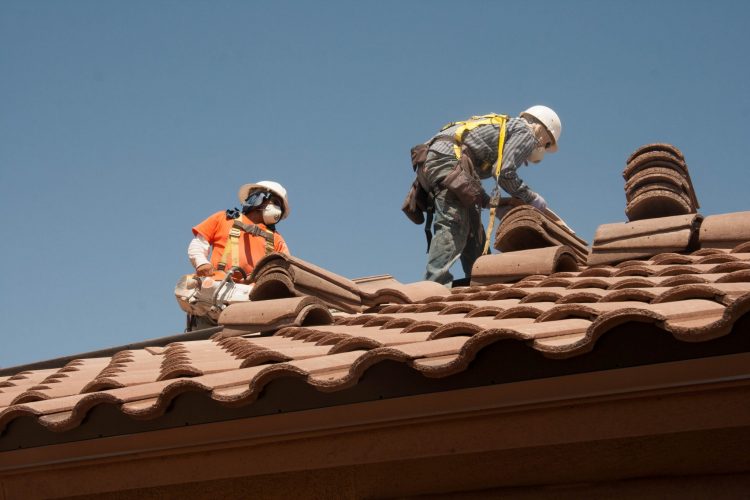
1. Install or Repair a Roof
Roofs can come in various styles and materials, the one you choose for your home will depend on your budget and taste. Shingle roofs are the most common roof type in the USA
There are many eco-friendly roofs, for example, white roofs, metal roofs, living roofs, solar roofs and much more that are of excellent quality and very energy efficient. Some eco-friendly roofs might cost more, but they can in return pay for themselves by lowering your energy bills.
Roof materials that are less expensive have a minimum lifespan of 20 years, whereas more expensive materials are likely to last over 50 years. Many factors can play a role in the type of roof you choose, like whether the material is compatible to your climate, how much time and money you are willing to spend on maintenance or how much value do want the roof to add to your home. A good quality new roof will do wonders for the curb appeal of your home.
Most roof repairs involve the fixing of roof leakage, gutter repairs, the replacement of a missing shingle, etc. However, if your roof is at the end of its lifespan or you are dealing with extensive leakages on a regular basis, then it might be time to go shingle hunting.
2. Clean a Roof
If you want to get the maximum performance out of your roof, help your roof to last longer and contribute to the market value of your home, then you should keep your roof well maintained. Cleaning is a critical part of roof maintenance.
Various roof cleaning solutions are available for different roofing materials. Most roofs can also be thoroughly cleaned with a pressure washer set on low. Cleaning a roof can either be a DIY project, or it can be done by a professional. Keep in mind that wet roofs increase the fall risk on the roof. Therefore, it is always important to wear the right gear if you are doing the cleaning yourself.
The size, design, height, slope, and location of our home will all play a role in the cleaning costs when you hire a professional. The more challenging the cleaning process is, the more you will pay to have your roof cleaned.
Debris on the roof are very often the cause of roof leaks and moss and algae that is not taken care of in time can promote wood rot and erodes of specific shingle materials. Therefore, it is important to regularly inspect your roof and make sure it is clean to prevent more significant problems from occurring.
3. Install Holiday Lights
There is nothing better than Christmas lights to get everyone in the holiday spirit and brighten up the neighborhood. Installing holiday lights can be a fun DIY task, or you can even hire a professional to do the installation for you.
Installation cost will depend on the size of your home, the type of lights and the complexity of the wiring. LED lights are the more expensive lighting option, but they last longer, are more energy efficient, and as a bonus, they shine brighter.
Some holiday light installations will include extension cored or stakes installations that will keep the lights in place. Battery packs are also available if you do not want to use cords, while timers will help you stay energy efficient. The more illumination you opt for, the more you will be paying for installation cost.
4. Hire Roofing Inspector
It is to your advantage to have your roof inspected by a professional every few years. In this way, you can better understand the condition of our roof and know when it is time for a repair or replacement. Individual roofing materials will have different inspection procedures, each at their price.
Roof inspection does not involve removing any part of the roof as it can all be done visually. Furthermore, a professional will also look at your chimney, flashing, the gutter, downspout and the rest of the elements that are connected with your roof.
In the case that a roof inspection cannot be done physically or visually, infrared rays are used. These rays will assess the high and low temperature of the roof which will determine where the heat is escaping, making it clear that there might be a problem in that area of the roof.
The age and condition of your roof are two critical factors to know when you are buying or selling a home, which can only be accurately determined through a roof inspection.
This guide is presented to you by South Shore Roofing, roofing contractor Savannah GA.


Your article helped me a lot, is there any more related content? Thanks!